


Leather Braiding
Introduction
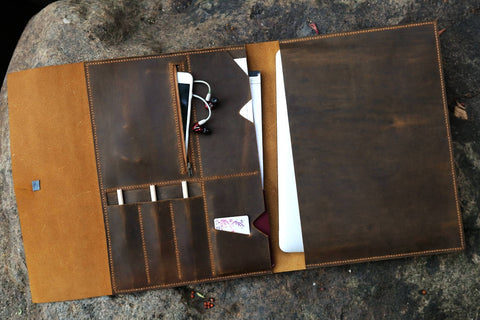
Leather braiding is a skilled craft that combines the durability and natural beauty of leather with various braiding techniques to create intricate designs and functional items. It's an art form that has been practiced for centuries across different cultures, often used to make horse tack, belts, jewelry, bag straps, and decorative elements on clothing and accessories. The appeal of leather braiding lies in its blend of utility and aesthetic, offering a timeless look that ages gracefully with use.
What About Braiding?
Braiding is generally a method used on accessories such as belts or leather clips, mainly divided into flat braiding and circular braiding. The number of leather ropes can also be three, four, five, six, eight, or even more, and the methods and styles of braiding are also diverse. Common braiding methods include four strand circular braiding, seven strand mesh braiding, and three strand mesh braiding.
Structure: The result is a continuous, plait-like pattern that is usually solid and compact, without gaps between the strands.
Applications:Braiding is widely used in hairstyling, jewelry making, crafting decorative trims, and creating ropes or cords.
Braided Leather Belt
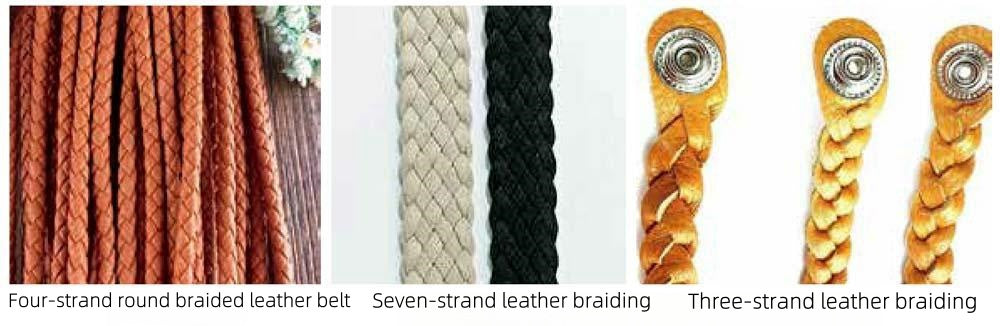
We can use three different weaving methods to make braided leather belt .
Including four-strand round braid ,seven-strand braiding and three-strand braiding
Four-strand round braided leather belt
Creating a four-strand round braided leather belt may seem complex at first, but with practice, it becomes an enjoyable and rewarding craft activity. This braid type is versatile and can also be used for making jewelry, decorations, or even functional items. Here’s a step-by-step guide to help you get started.
Materials Needed:
Four strands of leather, or any material you prefer. Ensure they are of equal length and thickness.A clip or tape to secure the top of your braid to a stable surface for easier braiding.
Instructions:
1.Setup:
Secure the top ends of your four strands together with a clip or tape them to a stable surface. This will keep the braid tight and even as you work.
2.Organize Your Strands:
Lay out the strands side by side. It may help to number them 1 to 4 from left to right to keep track of their position.
3.Starting the Braid:
Take strand 4 (the far right strand) and cross it over strand 3, then under strand 2.
Now, take the new strand 1 (previously strand 2) and cross it over the new strand 2 (previously strand 3).Just as the figures showing:


Firstly,Thread two leather lines through the middle of the ring and fold them in half. Pull 1 above 2 to form a cross
Secondly,Wrap 4 backwards, pull out between 1 and 3, and cross over 1, side by side with 2
And then,Wrap 3 backwards, pull it out between 2 and 4, and cross it over 4, side by side with 1


Wrap 2 backwards, pull it out between 1 and 3, and cross it over 3, side by side with 4. In the above steps, it is necessary to indeed tighten the wire
Wrap 4 backwards, pull out between 1 and 3, and cross over 1, side by side with 2
Wrap 1 backwards, pull it out between 4 and 2, and cross it over 2, side by side with 3


After weaving, wrap the excess thread tightly around the remaining three strands, and finally insert the tail end into the middle for fixation
After organizing the shape, cut off the excess line segments neatly
4.Repeating the Pattern:
Continue this pattern: taking the outer right strand over the strand next to it, then under the next one, and finally, take the new outer left strand and cross it over to the middle.
Always start with the outer right strand, moving it over and then under towards the left, and then take the new outer left strand and cross it over one strand to the right.
5.Maintaining Tension:
Keep the tension consistent as you braid. This will ensure that the braid is even and the round shape is maintained throughout.
6.Finishing the Braid:
Continue braiding until you reach the desired length.
Secure the end with a knot or another clip. If you're making a bracelet or a necklace, you can now add clasps or other closures.
7.Optional:
Feel free to experiment with different materials and colors. Mixing colors can create visually appealing patterns within the braid.
At last,use a leather hole punch to create holes for the belt buckle pin. The first hole should be approximately 4-6 inches from the end of the braided part, with additional holes spaced about 1 inch apart for adjustability.
If using, glue or stitch the leather end caps to the cut ends of the braid for a polished look. Ensure any loose ends are secured and trimmed.
Apply a leather conditioner to keep your belt flexible and protect it from wear and tear.
Seven-strand leather braiding
Just like Four-strand round braided leather belt process, we create a Seven-strand braiding using the same operating steps.


Keep one end of the leather as it is, and evenly cut the other end into seven equal parts. Wrap 4 below 2 to form a cross
Pull 3 and 5 at an angle parallel to 2, then weave them in the order of 6 down, 3 up, and 2 down, and finally side by side with 4
Weave 7 in the order of 5 up, 3 down, and 2 up, and finally side by side with 6
Three-strand leather braiding
Three-strand leather braiding is simpler than four or seven strand leather braiding, and can be divided into three single thread braiding and single strand braiding without cutting the head and tail. Some people also refer to three strand braiding without cutting the head and tail as magic braiding, and the braiding steps are shown in Figure.

Three strand weaving step diagram
Leather edge braiding methods:
These leather braiding methods are often used at the edges of wallets and bags, and can also be used as a part of the designer's overall leather product design.

Leather edge weaving method
Complex leather braiding can also be combined with hollow out methods to interweave leather and produce various effects.

The weaving and complex weaving effects of hollow out effect.