


Tooling leather-the ultimate guide
Introduction:
Our article is mainly to introduce tooling leather to everyone. Our D&M Leather Studio has always been committed to creating the most suitable, personalized, and artistic leather products for customers. So, tooling leather is indeed our most important raw material, on which we can make perfect finished products. Therefore, this blog mainly discusses the definition, purpose, usage, advantages and disadvantages of tooling leather, hoping that readers will like it.
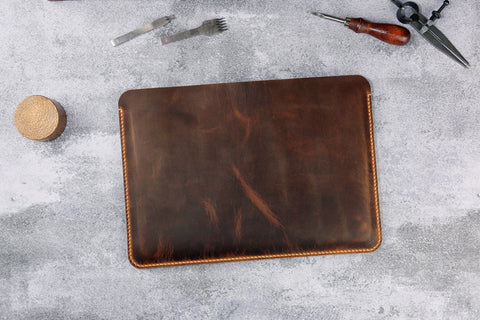
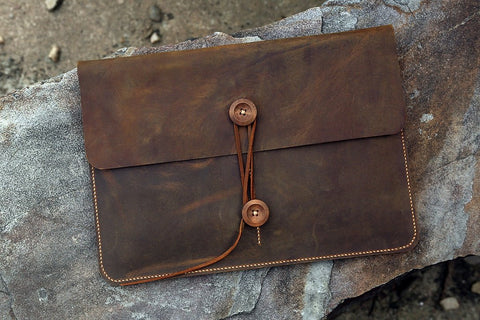
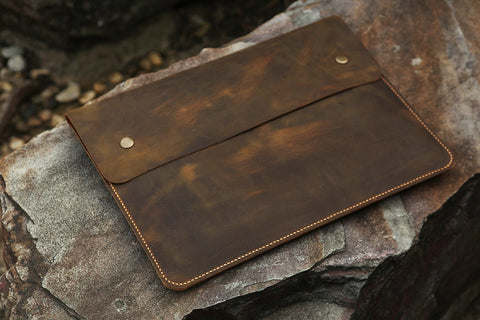
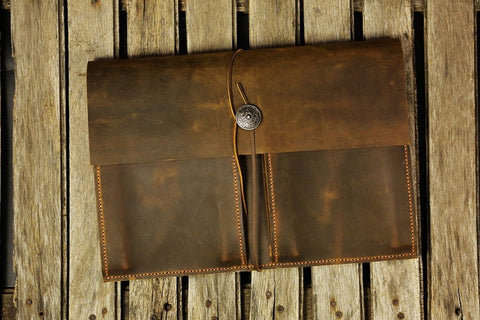
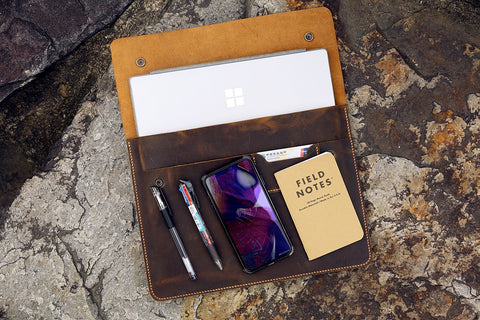
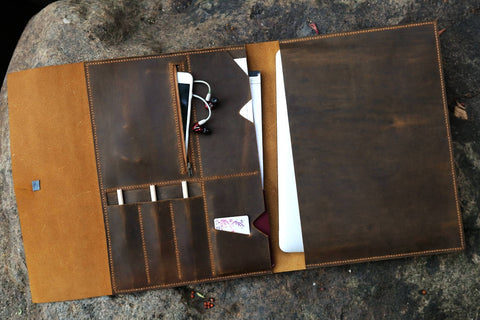
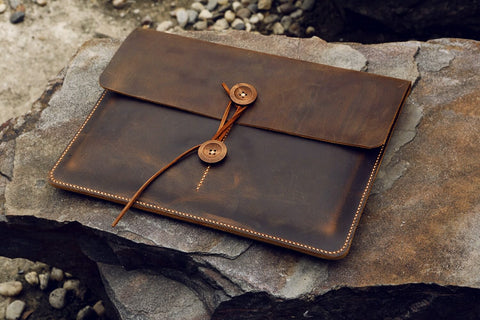
 Tooling Leather Looks
What is tooling leather?
Tooling leather refers to a type of leather that is specifically treated to be ideal for crafting and carving. This leather is typically vegetable-tanned, which makes it thick and firm, providing a stable and durable surface that can be tooled or stamped with designs. The vegetable tanning process uses tannins from plant materials, which imparts a natural color to the leather and makes it more environmentally friendly compared to other tanning methods.
The primary characteristics that make tooling leather suitable for craftsmanship include its ability to retain impressions made by tools, such as stamps or styluses, and its durability. It's commonly used for making belts, saddles, wallets, and other goods where the addition of embossed or carved designs enhances the aesthetic value. Tooling leather is also favored for its ability to develop a patina over time, which can enhance its appearance as it ages.
Tooling Leather is a subset of real leather. Tooling leather is typically made from the thicker layers of a hide and is vegetable-tanned to make it durable and suitable for crafting. The vegetable tanning not only makes the leather robust but also allows it to absorb water and oils, making it ideal for being shaped, stamped, or carved without tearing.
What are the usages of tooling leather?
Tooling leather is a versatile material primarily used in leather crafting due to its unique properties that allow it to be easily shaped, carved, and stamped. Here are some common uses of tooling leather:
Leathercraft Projects: Tooling leather is ideal for making custom leather goods such as wallets, belts, handbags, and holsters. Its ability to hold impressions from stamps and tools makes it popular for decorative purposes. Using tooling leather to create leathercraft projects is a rewarding process that involves several steps, each requiring specific leather tools and leather working tools. We can provide detailed case studies in the following text.
Saddlery and Tack: It is commonly used in the manufacture of saddles, bridles, and other equestrian gear because of its durability and the aesthetic appeal of tooled designs.
Footwear: Used in the production of high-quality leather shoes and boots, especially in areas where intricate details are desired.
Bookbinding: Tooling leather can be used for the covers of books, where it can be tooled and dyed to create luxurious and durable finishes.
Fashion Accessories: Belts, wristbands, and other fashion accessories often utilize tooling leather for its robustness and the ability to craft detailed, personalized designs.
Home Decor: Items like coasters, wall hangings, and decorative panels can be made from tooling leather, providing a rustic or refined look depending on the finish.

What is tooling leather?
How to use leather tool and tooling leather?
Using leather tools effectively with tooling leather involves a combination of proper preparation and skilled technique. Here’s a detailed step-by-step guide on how to utilize these tools to work with tooling leather:
1. Preparation of the Leather
Choose the Right Type of Leather: For tooling, use vegetable-tanned leather, which is ideal due to its absorbency and flexibility when wet.
Cutting to Size: Use a sharp utility knife or a leather cutting tool to cut the leather to the desired size and shape. leather craft tools Can effectively improve efficiency.
Conditioning: Before tooling, the leather should be slightly dampened. Use leather tools ,just like a sponge or a spray bottle to apply water evenly. The leather should absorb the water but not be so wet that it feels soggy.
2. Transferring Your Design
Stylus and Tracing Film: If you have a specific design in mind, use tracing film. Place the film over the leather and use a stylus to gently trace the design, leaving an imprint on the leather’s surface.
Freehand Drawing: Alternatively, you can use a pencil to lightly sketch your design directly onto the damp leather.
3. Tooling the Leather
Swivel Knife: Use a swivel knife to carve the outlines of your design. This tool should be held like a pencil and tilted slightly to get a smooth, clean cut.
Leather Stamping Tools: Use various stamping tools to add texture and detail. This can include bevelers to create depth, shaders to add gradients, and background tools to give texture to the negative space.
Hammer or Maul: A hammer or maul is used to strike the tools. Ensure each hit is firm and controlled for consistent impressions.
4. Adding Color and Finishes
Dyeing: To make leather tooling patterns,Apply leather dye with a dauber, sponge, or brush for coloration. Work in a well-ventilated area and use gloves to protect your hands.
Sealing: After the dye has dried, apply a leather finish to protect your work and enhance the color.
5. Assembly and Stitching
Hole Punching: If your project requires assembling or adding attachments, use leather punch tool, to make holes for stitching or hardware.
Stitching: Use a stitching awl and waxed thread to sew pieces together. Ensure your stitches are even and straight to maintain strength and aesthetics.
Edge Finishing: Smooth and round off the edges with an edge beveler, then apply an edge coat or burnish them with a wooden slicker for a polished look.
6. Adding Hardware
Installments: Attach any buckles, snaps, rivets, or other hardware as needed, using appropriate setting tools to secure them in place.
Here’s a comprehensive guide on how to craft with tooling leather:
1. Choosing the Right Leather: Begin by selecting a piece of tooling leather, typically vegetable-tanned, which is best for carving and stamping due to its thickness and ability to absorb moisture.
2. Preparing the Leather: Cut the leather to your desired size using a sharp utility knife or leather shears. It’s important to work with a clean surface, so wipe down the leather with a damp cloth to remove any dust or oils.
3. Dampening the Leather: Lightly wet the surface of the leather with a sponge or spray bottle. The leather should be damp but not soaked, as this makes it pliable and easier to imprint with designs.
4. Transferring the Pattern: Use a pencil or stylus to lightly draw your design onto the damp leather. For more intricate patterns, you might use tracing film placed over the leather, outlining the design with a stylus to leave a faint impression.
5. Carving and Tooling: With your pattern transferred, begin carving along the outlines using a swivel knife, which allows for smooth, curving cuts. After carving, employ various stamping tools to add depth and texture to your design. Stamping tools like bevelers, shaders, and backgrounders enhance the visual impact of your work by creating shadows and dimensions.
6. Adding Color and Finishing: Once the tooling is complete, you can add color to your project using leather dyes or paints. Apply these carefully with a sponge or brush. After the dye has dried, seal the leather with a finisher to protect the color and maintain the leather’s condition.
7. Assembling the Project: If your project consists of multiple pieces, such as a wallet or a bag, you’ll need to stitch them together. Use a stitching awl and waxed thread for durability. Ensure that your stitching is even and neat for a professional appearance.
8. Final Touches: You might add hardware like buckles, snaps, or rivets, depending on the project. Leather edge bevelers and burnishers can be used to smooth and finish the edges for a clean, refined look.

How to use leather tool and tooling leather?
what are the advantages and disadvantages of tooling leather?
Tooling leather, specifically vegetable-tanned leather, is distinct in its properties and uses when compared to other types of leather. Here are some advantages and disadvantages of using tooling leather compared to other leather types:
1、Advantages of Tooling Leather
Moldability and Tooling Capability: Tooling leather is excellent for carving, stamping, and molding due to its firmness and absorbency. It holds shapes and designs well, making it perfect for detailed artwork.
Durability: Vegetable-tanned leather, which is commonly used for tooling, is highly durable and can last for many years if properly maintained. It's often used for products that require longevity, such as saddles, belts, and high-quality leather goods.
Natural Aesthetics: Tooling leather develops a rich patina over time, enhancing its aesthetic appeal. This aging process is prized in leather goods for its beauty and character.
Eco-Friendliness: The tanning process for vegetable-tanned leather uses natural materials, mostly tree bark, which are less harmful to the environment compared to the chemicals used in other tanning processes like chrome tanning.
2、Disadvantages of Tooling Leather
Cost: Tooling leather is generally more expensive than other types of leather due to the lengthy and labor-intensive tanning process required to produce it.
Water Sensitivity: While its ability to absorb water makes it great for tooling, this characteristic also makes it more susceptible to water damage if not properly finished and cared for.
Limited Color Range: The natural tanning process does not lend itself well to the bright and varied colors available with other tanning methods like chrome tanning. As a result, tooling leather typically comes in natural and earthy tones.
Stiffness: Tooling leather is stiffer than other leathers, which can make it difficult to use for certain applications that require softer, more pliable materials, such as some fashion accessories and upholstery.
Maintenance Needs: Due to its natural composition, vegetable-tanned leather requires regular conditioning and proper storage to prevent drying out and cracking.
In comparison, other leathers, such as those tanned using chromium salts (chrome-tanned leather), may be softer, more colorfast, and resistant to water and stains. However, they lack the same tooling capabilities and environmental benefits. The choice between tooling leather and other types of leather largely depends on the specific requirements of the project and the values of the craftsman or consumer.